
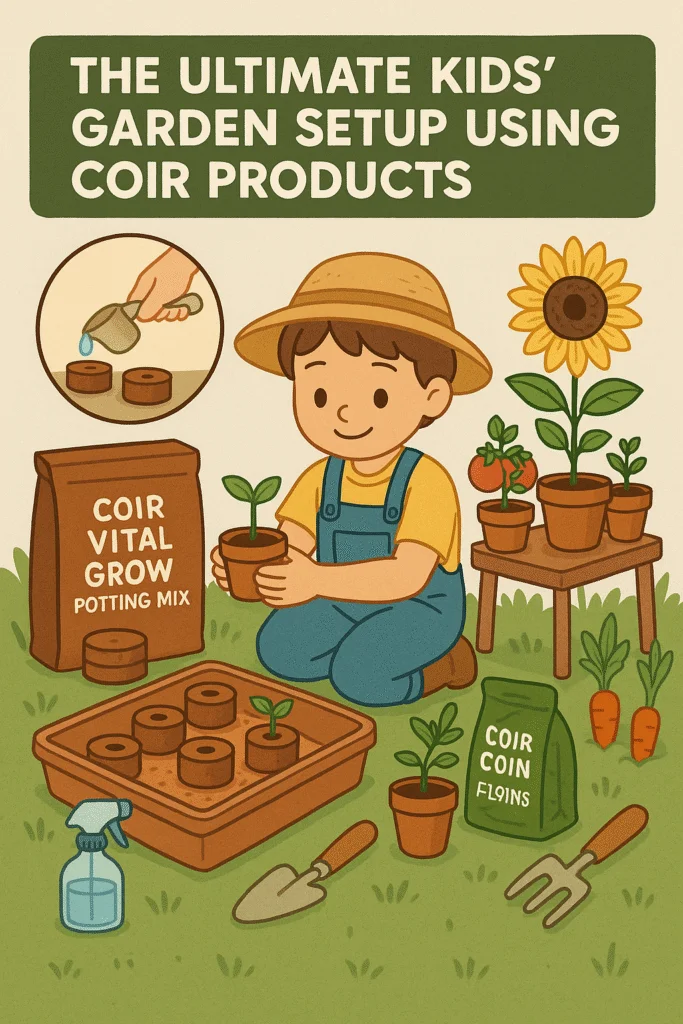
The Ultimate Kids’ Garden Setup Using Coir Products
Starting a garden with your child can be one of the most rewarding activities you share together. It sparks curiosity, teaches responsibility, and nurtures a love for nature all while being fun and engaging. For parents and caregivers, setting up a children’s garden might feel overwhelming at first, but with the right tools and approach, it can be simple, sustainable, and exciting. Using coir based products makes it even easier: coir is natural, biodegradable, safe for kids, and perfect for small hands to handle. Here’s your step by step guide to the ultimate kids’ garden setup using coir.
Why Coir is Perfect for Kids’ Gardening
Before diving into the steps, it’s worth understanding why coir products are such a great fit for children’s gardens.
- Safe and Natural: Coir comes from coconut husks, making it free from synthetic chemicals often found in other growing mediums.
- Easy to Handle: Lightweight and soft, coir compost and pots are easy for kids to scoop, fill, and plant with.
- Mess Free Expansion: Coir coins or compressed blocks expand with water kids love watching them grow, turning setup into a fun science experiment.
- Sustainable Choice: Choosing coir means you’re teaching children the importance of eco friendly choices from the start.
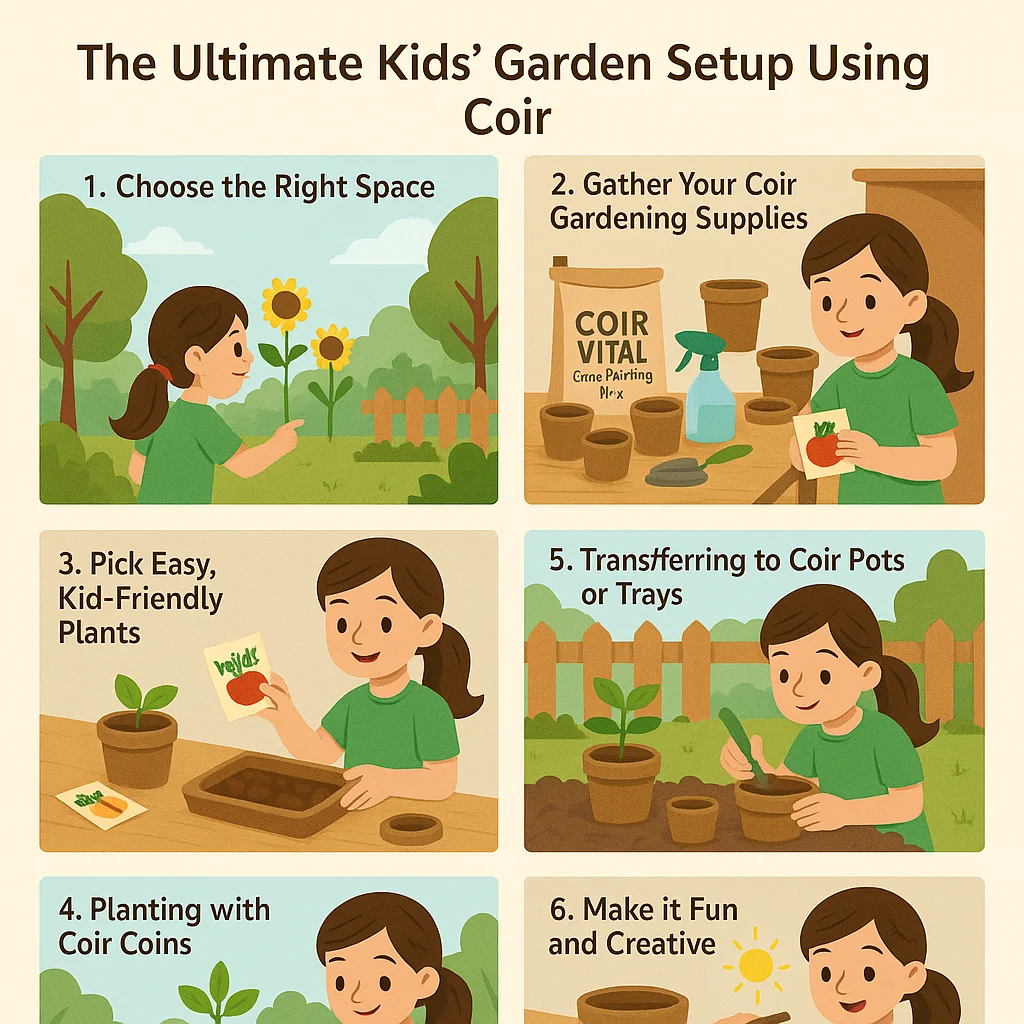
Step 1: Choose the Right Space
Select a spot where your child’s garden will thrive. If you don’t have outdoor space, don’t worry coir products are perfect for windowsills, balconies, or patios. Coir trays and pots make container gardening easy, so children can grow plants even in small spaces.
Step 2: Gather Your Coir Gardening Supplies
To get started, here’s a handy list of coir based essentials:
- Coir Coins: Ideal for starting seeds, just add water and watch them expand.
- Coir Vital Grow Potting Mix: A nutrient rich medium to help plants establish strong roots.
- Coir Pots or Trays: Biodegradable containers that can be planted directly into the soil later, teaching kids about reducing waste.
- A Spray Bottle and Small Tools: Child friendly tools and a spray bottle keep things simple and manageable.
Step 3: Pick Easy, Kid Friendly Plants
Children will stay engaged if they see results quickly. Good options include:
- Sunflowers – Tall, bright, and fast growing.
- Tomatoes – Rewarding and edible, perfect for coir pots on a balcony.
- Herbs (like basil or mint) – Great for windowsills and fun for children to smell and taste.
- Carrots or Radishes – Easy to sow and exciting to harvest.
Step 4: Planting with Coir Coins
This step is where the magic happens for kids. Place coir coins in a tray and let your child add water. They’ll love watching the coins swell into fluffy compost. Once expanded, pop in the seeds, gently cover, and place the tray somewhere warm.
Encourage your child to check daily and mist lightly with water. They’ll learn patience while eagerly awaiting the first sprouts.
Step 5: Transferring to Coir Pots or Trays
When seedlings are strong enough, it’s time to transfer them. Coir pots make this easy just place the seedling (still in its coir pot) into a bigger container or garden bed. Because coir pots are biodegradable, they break down naturally in the soil, feeding the plant and reducing transplant shock.
Step 6: Establishing a Routine
Children thrive on routine, and gardening is no different. Help them set up a simple schedule:
- Daily check-ins for watering and watching growth.
- Weekly activities like measuring how tall the plants are or drawing pictures of progress.
- Harvest time rituals like picking herbs for family meals or celebrating the first sunflower bloom.
These routines build responsibility and pride in their garden.
Step 7: Make it Fun and Creative
The Bigger Picture: Growing More Than Just Plants
By starting a garden with coir, you’re doing more than helping your child grow tomatoes or sunflowers. You’re planting the seeds of environmental awareness, patience, and care. Coir makes the process smoother, safer, and more sustainable ensuring kids enjoy every step.
Whether your garden is on a windowsill or in a backyard, the ultimate kids’ garden setup using coir is a chance to bond, learn, and grow together.
🍅 Quick Start Checklist: How to Grow Tomatoes in a Growbag
- Choose a sunny spot with 6–8 hours of light.
- Prepare coir growbag: shake, flatten, and cut 2–3 planting holes.
- Plant young tomato plants or transplant seedlings.
- Water daily in warm weather (keep compost moist, not soggy).
- Feed every 7–10 days once flowers appear.
- Add support: insert canes or cages and tie stems gently.
- Prune side shoots and remove yellowing leaves for healthy growth.
- Harvest when fruits are firm, coloured, and come off easily.
Disclaimer: This article is provided for general information only and does not constitute engineering, environmental, design, legal, or professional advice. Project-specific advice should always be obtained from suitably qualified professionals.
Starting a garden with your child can be one of the most rewarding activities you share together. It sparks curiosity, teaches responsibility, and nurtures a love for nature all while being fun and engaging. For parents and caregivers, setting up a children’s garden might feel overwhelming at first, but with the right tools and approach, it can be simple, sustainable, and exciting. Using coir based products makes it even easier: coir is natural, biodegradable, safe for kids, and perfect for small hands to handle. Here’s your step by step guide to the ultimate kids’ garden setup using coir.
Why Coir is Perfect for Kids’ Gardening
Before diving into the steps, it’s worth understanding why coir products are such a great fit for children’s gardens.
- Safe and Natural: Coir comes from coconut husks, making it free from synthetic chemicals often found in other growing mediums.
- Easy to Handle: Lightweight and soft, coir compost and pots are easy for kids to scoop, fill, and plant with.
- Mess Free Expansion: Coir coins or compressed blocks expand with water kids love watching them grow, turning setup into a fun science experiment.
- Sustainable Choice: Choosing coir means you’re teaching children the importance of eco friendly choices from the start.
Step 1: Choose the Right Space
Select a spot where your child’s garden will thrive. If you don’t have outdoor space, don’t worry coir products are perfect for windowsills, balconies, or patios. Coir trays and pots make container gardening easy, so children can grow plants even in small spaces.
Step 2: Gather Your Coir Gardening Supplies
To get started, here’s a handy list of coir based essentials:
- Coir Coins: Ideal for starting seeds, just add water and watch them expand.
- Coir Vital Grow Potting Mix: A nutrient rich medium to help plants establish strong roots.
- Coir Pots or Trays: Biodegradable containers that can be planted directly into the soil later, teaching kids about reducing waste.
- A Spray Bottle and Small Tools: Child friendly tools and a spray bottle keep things simple and manageable.
Step 3: Pick Easy, Kid Friendly Plants
Children will stay engaged if they see results quickly. Good options include:
- Sunflowers – Tall, bright, and fast growing.
- Tomatoes – Rewarding and edible, perfect for coir pots on a balcony.
- Herbs (like basil or mint) – Great for windowsills and fun for children to smell and taste.
- Carrots or Radishes – Easy to sow and exciting to harvest.
Step 4: Planting with Coir Coins
This step is where the magic happens for kids. Place coir coins in a tray and let your child add water. They’ll love watching the coins swell into fluffy compost. Once expanded, pop in the seeds, gently cover, and place the tray somewhere warm.
Encourage your child to check daily and mist lightly with water. They’ll learn patience while eagerly awaiting the first sprouts.
Step 5: Transferring to Coir Pots or Trays
When seedlings are strong enough, it’s time to transfer them. Coir pots make this easy just place the seedling (still in its coir pot) into a bigger container or garden bed. Because coir pots are biodegradable, they break down naturally in the soil, feeding the plant and reducing transplant shock.
Step 6: Establishing a Routine
Children thrive on routine, and gardening is no different. Help them set up a simple schedule:
- Daily check-ins for watering and watching growth.
- Weekly activities like measuring how tall the plants are or drawing pictures of progress.
- Harvest time rituals like picking herbs for family meals or celebrating the first sunflower bloom.
These routines build responsibility and pride in their garden.
Step 7: Make it Fun and Creative
The Bigger Picture: Growing More Than Just Plants
By starting a garden with coir, you’re doing more than helping your child grow tomatoes or sunflowers. You’re planting the seeds of environmental awareness, patience, and care. Coir makes the process smoother, safer, and more sustainable ensuring kids enjoy every step.
Whether your garden is on a windowsill or in a backyard, the ultimate kids’ garden setup using coir is a chance to bond, learn, and grow together.
Quick Start Checklist: How to Grow Tomatoes in a Growbag
- Choose a sunny spot with 6–8 hours of light.
- Prepare coir growbag: shake, flatten, and cut 2–3 planting holes.
- Plant young tomato plants or transplant seedlings.
- Water daily in warm weather (keep compost moist, not soggy).
- Feed every 7–10 days once flowers appear.
- Add support: insert canes or cages and tie stems gently.
- Prune side shoots and remove yellowing leaves for healthy growth.
- Harvest when fruits are firm, coloured, and come off easily.
Disclaimer: This article is provided for general information only and does not constitute engineering, environmental, design, legal, or professional advice. Project-specific advice should always be obtained from suitably qualified professionals.
Tomatoes are one of the most rewarding crops to grow at home. Not only do they taste far better than anything you can buy in a supermarket, but they are also surprisingly easy to cultivate even if you don’t have a large garden. One of the most convenient and space saving ways to grow tomatoes is by using a growbag. Coir based growbags, in particular, are ideal: they provide excellent drainage, retain moisture, and are lightweight and eco friendly. Here’s a step by step guide to help you get started.
Why Use a Growbag for Tomatoes?
Growbags are perfect for anyone who wants to grow fresh tomatoes without the need for digging, preparing soil, or managing a large vegetable patch. They can be placed on patios, balconies, or in small gardens, making them accessible for beginners and seasoned gardeners alike.
Coir based growbags offer additional advantages:
- Sustainability: Made from coconut husks, coir is renewable and biodegradable.
- Excellent Drainage and Aeration: Prevents waterlogging and helps tomato roots breathe.
- Ease of Use: Simply place the bag, cut planting holes, and you’re ready to grow.
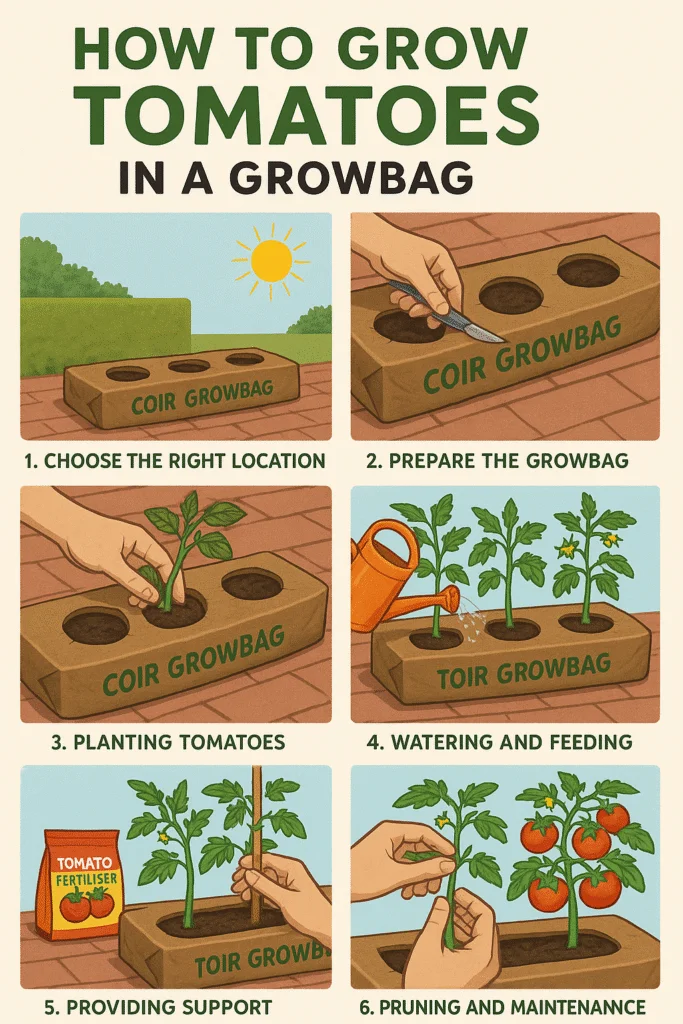
Step 1: Choose the Right Location
Tomatoes love warmth and sunlight. Place your growbag in a spot that gets at least 6–8 hours of direct sunlight daily. A patio, greenhouse, or balcony with good light exposure is ideal. Ensure the surface is level and sturdy, as the bag will be heavy once watered.
Step 2: Prepare the Growbag
Shake the growbag gently to distribute the compost evenly. Most coir-based growbags are compressed, so if required, add water to expand and fluff up the medium before planting. Using a sharp knife or scissors, cut two or three planting holes on the top of the bag, depending on its size. Avoid overcrowding tomatoes need space to grow strong.
Step 3: Planting Tomatoes
You can either sow seeds directly or transplant young tomato plants into the growbag. Most gardeners prefer transplants as they establish quickly and save time.
- For seeds: Sow into small pots or coir coins first, then transfer seedlings once they have 3–4 true leaves.
- For young plants: Dig a hole in the growbag compost, place the plant in, and firm the compost gently around the roots.
Leave enough room between plants to allow airflow and healthy growth.
Step 4: Watering and Feeding
Tomatoes are thirsty plants. Water your growbag regularly to keep the compost moist but not soggy. Coir growbags are excellent at holding moisture evenly, which reduces the risk of overwatering.
- Water daily in warm weather.
- Feed every 7–10 days with a tomato fertiliser once the first flowers appear. A balanced feeding routine ensures strong plants and abundant fruit.
Step 5: Providing Support
Tomato plants need support as they grow tall and heavy with fruit. Insert canes or a tomato cage directly into the growbag near each plant. Gently tie the plant stems to the support using soft garden ties or string, checking regularly as the plant grows taller.
Step 6: Pruning and Maintenance
To keep your tomato plants healthy:
- Remove yellowing leaves near the base to improve airflow and reduce disease risk.
- Keep the growbag surface free of weeds or debris.
Step 7: Harvesting
Tomatoes are ready to harvest when they are firm, brightly coloured, and come off the vine with a gentle twist. Pick regularly to encourage the plant to produce more fruit. With good care, each plant can provide several kilograms of tomatoes over the season.
Final Thoughts
Growing tomatoes in a growbag is one of the easiest and most productive ways to enjoy home grown produce. Whether you’re new to gardening or a seasoned grower, coir-based growbags make the process simpler, more sustainable, and highly rewarding.
If you’d like a ready to go option, our “Let’s Grow Tomatoes” kids’ pack is a fun introduction for families, while our premium coir growbags are ideal for serious growers who want abundant, delicious tomatoes at home.
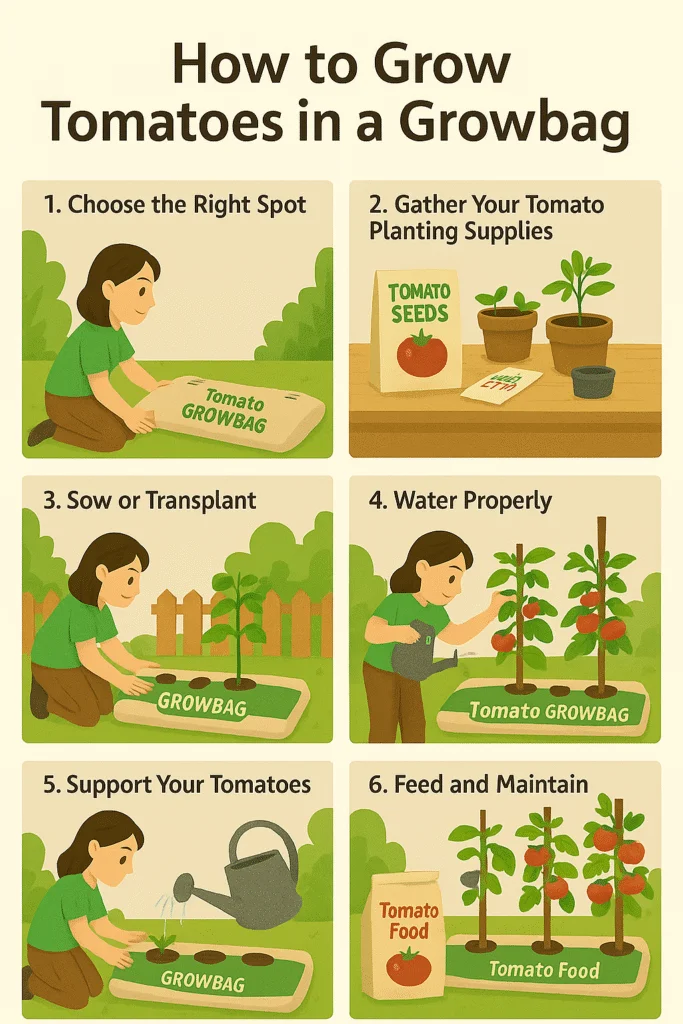
Quick Start Checklist: How to Grow Tomatoes in a Growbag
- Choose a sunny spot with 6–8 hours of light.
- Prepare coir growbag: shake, flatten, and cut 2–3 planting holes.
- Plant young tomato plants or transplant seedlings.
- Water daily in warm weather (keep compost moist, not soggy).
- Feed every 7–10 days once flowers appear.
- Add support: insert canes or cages and tie stems gently.
- Prune side shoots and remove yellowing leaves for healthy growth.
- Harvest when fruits are firm, coloured, and come off easily.
Disclaimer: This article is provided for general information only and does not constitute engineering, environmental, design, legal, or professional advice. Project-specific advice should always be obtained from suitably qualified professionals.
When it comes to gardening, choosing the right growing medium or container can make all the difference. At Coir Products by Salike, we’ve pioneered one of the largest ranges of coir based products in the UK all designed to make gardening sustainable, simple, and productive. But with so many options available, you might be wondering: which coir product is right for me?
Here’s a helpful guide to match our coir product range with the plants and growing situations that suit them best
How to Choose the Right Coir Product
Ask yourself a few quick questions:
- Starting from seeds? → Coir Coins or Seedling Trays.
- Growing seedlings for later transplant? → Coir Pots.
- Want an all purpose mix for pots/containers? → Coir Vital Grow Potting Mix.
- Focusing on tomatoes or fruiting veg in small spaces? → Coir Growbags.
By matching the product to your gardening goals, you’ll make the most of your plants and enjoy a smoother, more sustainable growing journey.
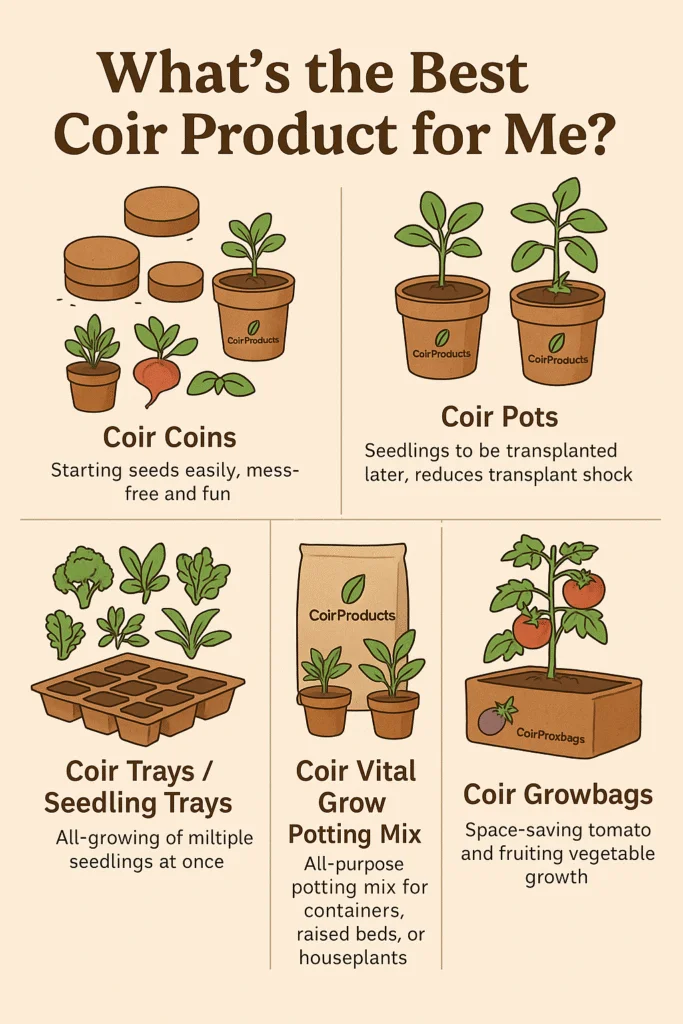
1. Coir Coins – Perfect for Seed Starting
What they are: Small, compressed discs of coir that expand when water is added.
Best for: Seeds and small seedlings. Kids and beginners love them because they’re easy, mess free, and fun to use.
How to use: Place coir coins in a tray, add warm water, and watch them expand. Pop a seed into each coin, keep moist, and once seedlings are ready, transfer them (coin included) into pots or soil.
Great for growing: Herbs, lettuce, radishes, tomatoes, or any small vegetable that starts from seed.
2. Coir Pots – Natural, Biodegradable Containers
What they are: Pots made from compressed coir fibres that can be planted directly into the ground.
Best for: Young plants and seedlings that need to be transplanted later.
How to use: Start your seedlings in coir pots filled with coir potting mix. When it’s time to move them outdoors or into a bigger container, simply plant the entire pot into the soil. The coir breaks down naturally, reducing transplant shock.
Great for growing: Tomatoes, peppers, cucumbers, courgettes, or flowering plants.
3. Coir Trays and Seedling Trays – For Bulk Growing
What they are: Larger trays with multiple cells, designed to start lots of seedlings at once.
Best for: Gardeners who want to grow a variety of plants or larger numbers of seedlings.
How to use: Fill with coir mix or use with coir coins, plant seeds, and keep in a sunny spot. Ideal for greenhouses or windowsills.
Great for growing: Leafy greens, brassicas (broccoli, cabbage, kale), and herbs in batches.
4. Coir Vital Grow Potting Mix – All-Purpose Medium
What it is: A nutrient rich, ready to use coir compost mix.
Best for: Anyone looking for a versatile, eco friendly growing medium.
How to use: Fill pots, containers, or raised beds directly with coir potting mix and plant seeds or seedlings. It retains moisture, drains well, and is suitable for a wide range of plants.
Great for growing: Houseplants, vegetables, herbs, fruiting plants, and ornamentals.
5. Coir Growbags – Space-Saving Tomato Specialists
What they are: Large, pre filled coir bags that can sit on patios, balconies, or in greenhouses.
Best for: Tomatoes, peppers, and other fruiting vegetables.
How to use: Lay flat, cut planting holes in the top, and insert plants. Water and feed regularly for an abundant harvest.
Great for growing: Tomatoes (especially), cucumbers, aubergines, and chillies.
How to Choose the Right Coir Product
Ask yourself a few quick questions:
- Starting from seeds? → Coir Coins or Seedling Trays.
- Growing seedlings for later transplant? → Coir Pots.
- Want an all purpose mix for pots/containers? → Coir Vital Grow Potting Mix.
- Focusing on tomatoes or fruiting veg in small spaces? → Coir Growbags.
By matching the product to your gardening goals, you’ll make the most of your plants and enjoy a smoother, more sustainable growing journey.
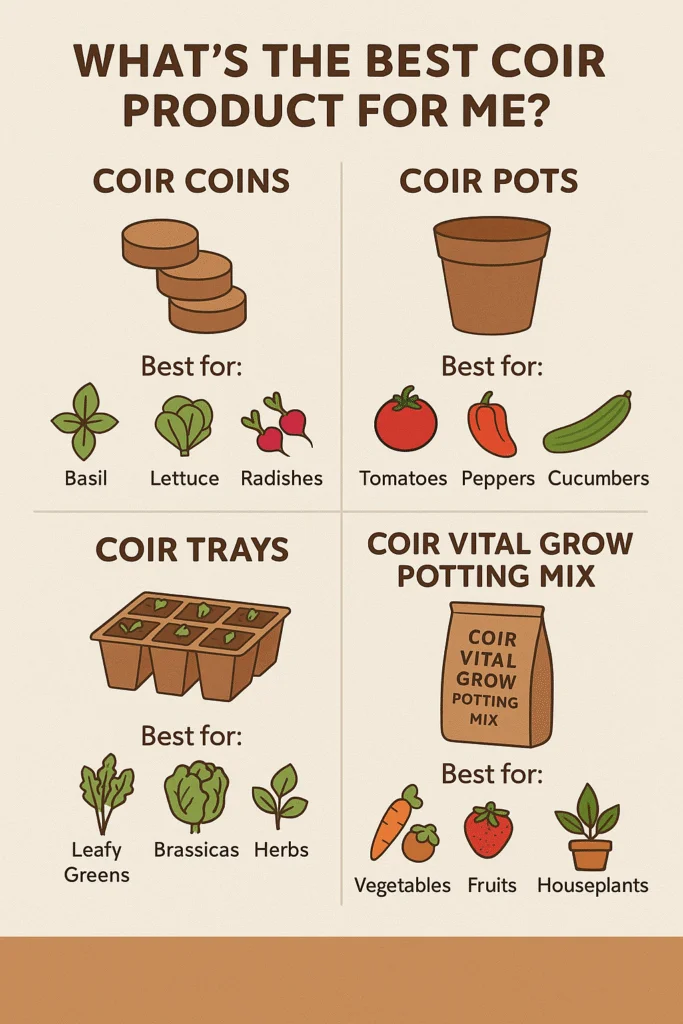
CoirProducts quick check list “What’s the Best Coir Product for Me?”
Need pots that you can plant straight into the ground?→ Use Coir Pots (tomatoes, peppers, cucumbers, courgettes).
Planning to grow lots of seedlings at once?→ Use Coir Trays / Seedling Trays (leafy greens, brassicas, herbs).
Want to start from seed?→ Use Coir Coins (herbs, lettuce, radishes, tomatoes).
Growing tomatoes or fruiting veg in small spaces?→ Use Coir Growbags (tomatoes, chillies, cucumbers, aubergines).
Looking for an all purpose compost?
→ Use Coir Vital Grow Potting Mix (vegetables, fruit plants, ornamentals, houseplants).
Disclaimer: This article is provided for general information only and does not constitute engineering, environmental, design, legal, or professional advice. Project-specific advice should always be obtained from suitably qualified professionals.
Starting seeds in coir is one of the easiest and most sustainable ways to begin your gardening journey. Coir is lightweight, retains water well, and provides excellent aeration for young roots. However, like with any growing medium, sometimes seeds don’t sprout as quickly as expected. If you’re struggling with germination, don’t worry here are the most common issues, how to identify them, and what you can do to fix them.
Why Seeds May Struggle in Coir
- Too Much or Too Little WaterCoir holds water beautifully, but overwatering can lead to soggy conditions that suffocate seeds, while underwatering leaves them too dry to sprout.
- Incorrect Temperature
Different seeds have different temperature needs. Warm weather plants like tomatoes and peppers may not germinate well if kept too cool. - Light vs. Darkness NeedsSome seeds need light to germinate (e.g., lettuce), while others prefer darkness (e.g., beans). Sowing depth and placement matter.
- Old or Poor Quality Seeds
Even the best coir won’t revive old seeds with low viability. Always check your seed packet’s “sow by” date. - Nutrient Deficiency at Early Stag
Coir is naturally low in nutrients. While this is ideal for germination, seedlings may stall soon after sprouting if not fed lightly.
How to Fix Common Germination Problems
- If seeds aren’t sprouting at all:
Check moisture levels coir should feel damp, like a wrung out sponge. Recheck sowing depth and ensure seeds haven’t been buried too deeply. - If seedlings emerge weak or spindly:This is often due to insufficient light. Move trays to a bright windowsill or use grow lights.
- If mould appears on the surface:This usually comes from too much water and poor airflow. Reduce watering slightly and improve ventilation.
- If sprouts dry out quickly:Increase humidity with a propagator lid, or mist regularly with a spray bottle.
- If germination is patchy:It could be seed quality. Try sowing a second round with fresh seeds in coir coins or trays.
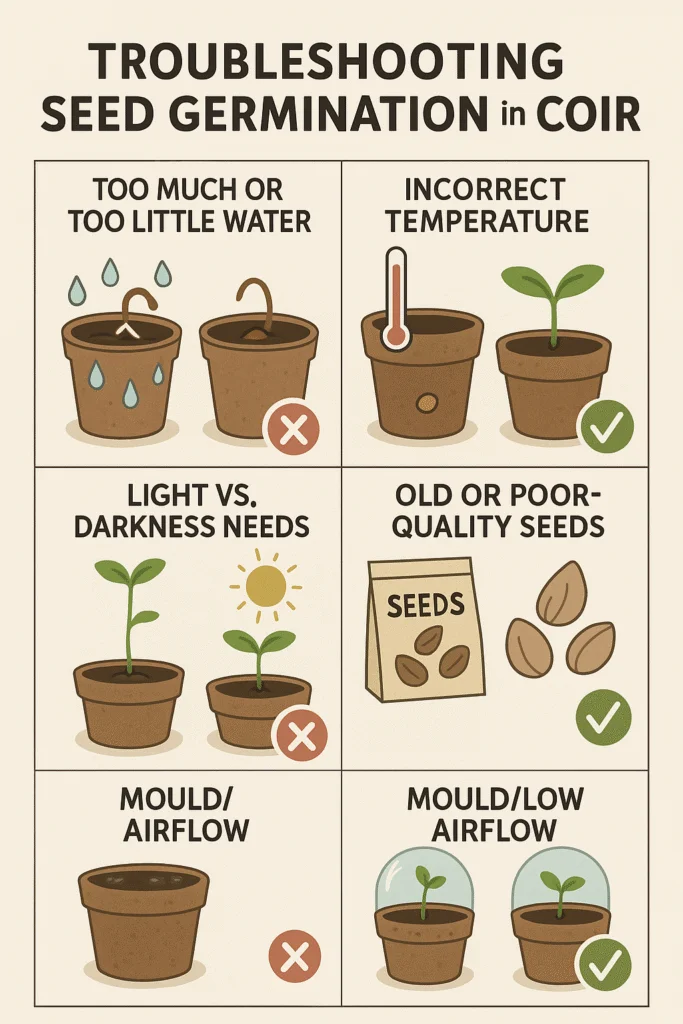
Quick Start Checklist: Troubleshooting Germination in Coir
- Keep coir evenly moist (not soggy, not dry).
- Sow seeds at the right depth (check seed packet).
- Provide 6–8 hours of light daily.
- Maintain the correct temperature (most seeds: 18–24°C).
- Use a propagator lid for humidity if needed.
- Ensure airflow to prevent mould.
- Label trays clearly to track progress.
- Use fresh, quality seeds for best results.
Top Tips for Better Germination in Coir
- Pre-soak seeds (like peas or beans) for faster sprouting.
- Bottom water trays instead of overhead watering to avoid disturbing seeds.
- Combine coir products: start in coir coins for consistent germination, then move seedlings into coir pots or coir trays with Coir Vital Grow Potting Mix.
- Patience pays off: Some seeds naturally take longer to germinate. Keep conditions steady and avoid overcorrecting too soon.
Disclaimer: This article is provided for general information only and does not constitute engineering, environmental, design, legal, or professional advice. Project-specific advice should always be obtained from suitably qualified professionals.
For gardeners, sustainability isn’t just about what you grow it’s also about how you make the most of the resources you already have. Coir, made from the natural husk of coconuts, is one of the most sustainable growing mediums available. But did you know that your coir doesn’t have to be single use? With the right care, you can store and reuse coir season after season, making it even more eco friendly and cost effective.
Below, we’ll guide you through why storing and reusing coir makes sense, how to prepare it for storage, and what steps to take before bringing it back into your garden.
Why Store and Reuse Coir?
- Eco-friendly practice – Extends the life of a natural product and reduces waste.
- Cost-saving – Reusing coir helps you save money on new growing media.
- Versatile reuse – Even if it’s not suitable for seed germination after heavy use, it’s perfect for soil conditioning, mulching, or mixing into beds.
- Sustainability – Reinforces your commitment to sustainable gardening practices.
Step 1: Preparing Coir After a Growing Season
- Remove plant debris – Pull out roots, stems, and any plant material left in the coir.
- Shake and break apart clumps – Coir compacts over time, so gently fluff it back into a looser texture.
- Rinse thoroughly – Flush the coir with clean water to remove excess salts or nutrient build up from fertilizers.
- Optional sterilisation – If plants suffered from disease, pasteurise the coir by baking it at 80°C for 30 minutes or using boiling water to kill pathogens.
Step 2: Storing Coir Properly
- Dry completely – Spread the rinsed coir out to air dry in the sun or indoors in a ventilated space. Storing damp coir can lead to mould growth.
- Store in breathable bags – Use hessian sacks, paper bags, or perforated containers that allow airflow. Avoid sealed plastic bags unless the coir is bone dry.
- Keep in a cool, dry place – Store away from moisture, pests, and direct sunlight. A shed, garage, or utility space works well.
Step 3: Reusing Coir in the Next Season
When it’s time to garden again:
- Rehydrate – Add water slowly until the coir regains its fluffy, workable structure.
- Mix in nutrients – Since reused coir may have fewer nutrients, add compost, organic fertilisers, or a fresh mix like Coir Vital Grow Potting Mix.
- Test for drainage – Ensure the coir still drains well; if it’s too compact, blend with perlite or fresh coir.
- Choose wisely – Reused coir is best for established plants, containers, or as a soil improver. For delicate seedlings, fresh coir (like Coir Coins or Seedling Trays) ensures the best germination.
Pro Tips for Gardeners
- Alternate coir’s role: one season for pots, the next as a soil conditioner.
- Combine reused coir with fresh coir for better structure and aeration.
- Label stored coir bags with the date and usage history to track quality.
By treating coir as a long term gardening ally, you not only get more value from your purchase but also make a real difference for the planet.
Coir Products Quick Checklist: How to Store & Reuse Coir
- Remove all plant roots and debris from coir.
- Rinse coir to flush out salts and nutrient build-up.
- Sterilise if disease was present.
- Dry thoroughly before storage.
- Store in breathable bags in a cool, dry place.
- Rehydrate before reuse.
- Mix with compost, nutrients, or fresh coir before planting.
- Use reused coir for pots, beds, and soil conditioning (fresh coir for seedlings).
Disclaimer: This article is provided for general information only and does not constitute engineering, environmental, design, legal, or professional advice. Project-specific advice should always be obtained from suitably qualified professionals.
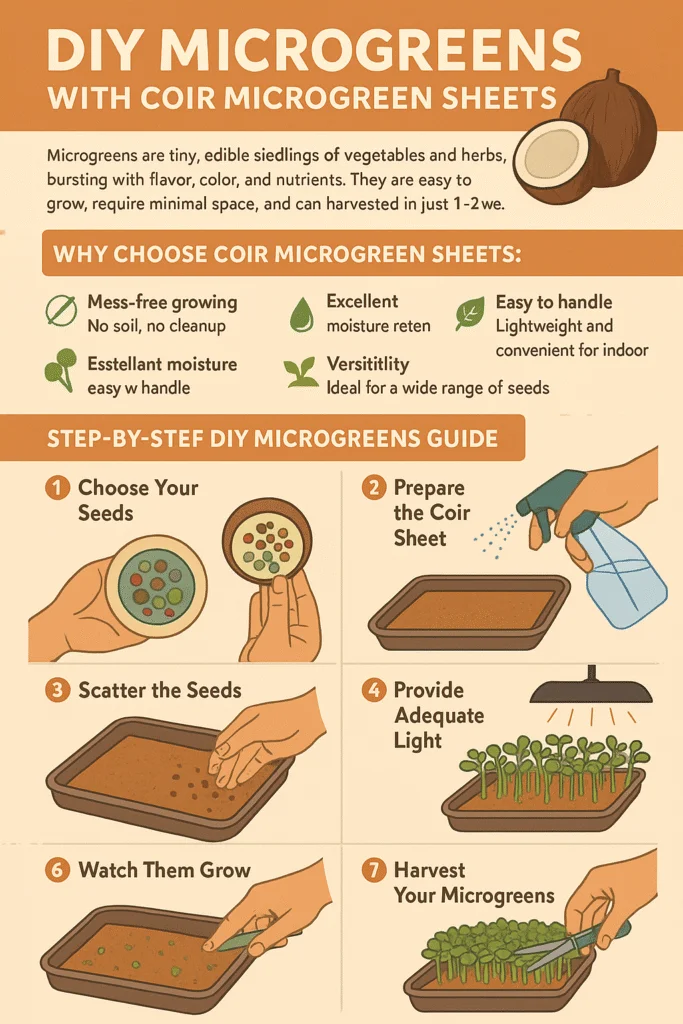
Microgreens are tiny, edible seedlings of vegetables and herbs, bursting with flavor, color, and nutrients. They are easy to grow, require minimal space, and can be harvested in just 1–2 weeks, making them perfect for home gardening enthusiasts, kids, and urban gardeners. Using coir microgreen sheets makes growing these little greens cleaner, faster, and more sustainable than traditional soil methods.
Why Choose Coir Microgreen Sheets?
Coir, made from coconut husks, is a natural and eco friendly growing medium. Unlike soil, coir is lightweight, easy to handle, and retains moisture exceptionally well, creating the perfect environment for seeds to sprout. Coir sheets are pre formed mats that can hold seeds evenly and simplify the watering and harvesting process. They are reusable, mess free, and biodegradable, making them a smart choice for anyone looking to grow fresh, homegrown microgreens sustainably.
Some benefits of coir microgreen sheets include:
- Mess free growing: No soil, no cleanup.
- Excellent moisture retention: Coir keeps seeds hydrated consistently.
- Sustainable: Made from renewable coconut husks.
- Easy to handle: Lightweight and convenient for indoor use.
- Versatile: Ideal for a wide range of seeds like radish, broccoli, mustard, basil, and more.
Step by Step DIY Microgreens Guide
- Choose Your SeedsStart by picking the seeds you want to grow. Popular choices for microgreens include radish, broccoli, mustard, kale, arugula, and herbs like basil and coriander. Each variety has unique flavors and nutritional benefits, so feel free to mix and match for a colorful tray.
- Prepare Your Coir SheetPlace the coir microgreen sheet in a shallow tray. If the sheet is dry, lightly mist it with water to ensure it is evenly moist. Coir’s natural structure helps water distribute evenly, giving seeds the consistent moisture they need to germinate.
- Scatter the Seeds
Evenly sprinkle the seeds over the coir sheet. Avoid overcrowding to give each seed enough space to grow. Lightly press the seeds into the coir to ensure good contact, but do not bury them microgreens grow best when seeds are on or just under the surface. - Water CarefullyMist your seeds with a spray bottle to avoid washing them away. Keep the coir sheet consistently moist, but avoid overwatering, which can lead to mold growth. A light daily mist is usually enough.
- Provide Adequate LightPlace your tray in a bright, sunny spot, or use a grow light if natural sunlight is limited. Microgreens need about 12–16 hours of light per day to grow strong and healthy. Rotate the tray occasionally to ensure even growth.
- Watch Them GrowWithin 7–14 days, you will start to see vibrant green shoots emerging. Microgreens grow quickly, so it’s important to monitor moisture and light daily to ensure they thrive.
- Harvest Your MicrogreensOnce your microgreens reach 2–4 inches tall, they are ready to harvest. Using scissors, cut just above the coir sheet, leaving the roots behind. Rinse gently if desired, then add them fresh to salads, sandwiches, smoothies, or as a garnish for meals.
Quick DIY Microgreens Checklist
- Choose your seeds (radish, broccoli, basil, etc.)
- Place coir sheet in a tray
- Sprinkle seeds evenly
- Mist daily to keep moist
- Provide bright, indirect light
- Monitor growth for 7–14 days
- Harvest with scissors
- Enjoy fresh, nutrient packed microgreens
Tips for Success
- Rotate trays to ensure even light exposure.
- Avoid overwatering to prevent mold.
- Use fresh seeds for the best germination rates.
- Experiment with different seed mixes for flavor variety.
- Try stacking multiple trays to maximize space in small areas.
Growing microgreens with coir sheets is a fun, easy, and eco friendly way to enjoy fresh, nutrient rich greens at home. It’s perfect for kids, beginner gardeners, or anyone looking to add more greenery to their kitchen. With minimal effort, you can enjoy a vibrant, healthy harvest in just a few days.
Disclaimer: This article is provided for general information only and does not constitute engineering, environmental, design, legal, or professional advice. Project-specific advice should always be obtained from suitably qualified professionals.
Coir Plus Advance is a premium, sustainable coir based growing medium designed to give your plants everything they need for strong, healthy growth. Unlike traditional soil, coir is made from the husks of coconuts, making it an eco friendly, renewable, and lightweight alternative. What makes Coir Plus Advance truly special is its combination of coir with a slow release fertilizer, providing your plants with consistent nutrients for up to six months. This ensures your plants not only grow well but thrive with minimal maintenance.
Why Coir Plus Advance Is Ideal for Your Plants
Using Coir Plus Advance offers several benefits over regular compost or soil:
- Sustained Nutrition: The integrated slow release fertilizer feeds your plants gradually over six months. This reduces the need for frequent feeding, prevents nutrient burn, and supports steady, balanced growth.
- Excellent Water Retention: Coir naturally holds water efficiently, keeping your plants hydrated while also allowing excess water to drain. This reduces the risk of overwatering or root rot.
- Aeration and Root Health: The fibrous structure of coir ensures good air circulation around roots, promoting strong root development and improving overall plant health.
- Eco-Friendly: Coir is a renewable resource, biodegradable, and environmentally sustainable, making Coir Plus Advance an eco conscious choice.
- Versatility: Suitable for indoor and outdoor plants, container gardening, vegetable beds, flowers, shrubs, and even fruiting plants.
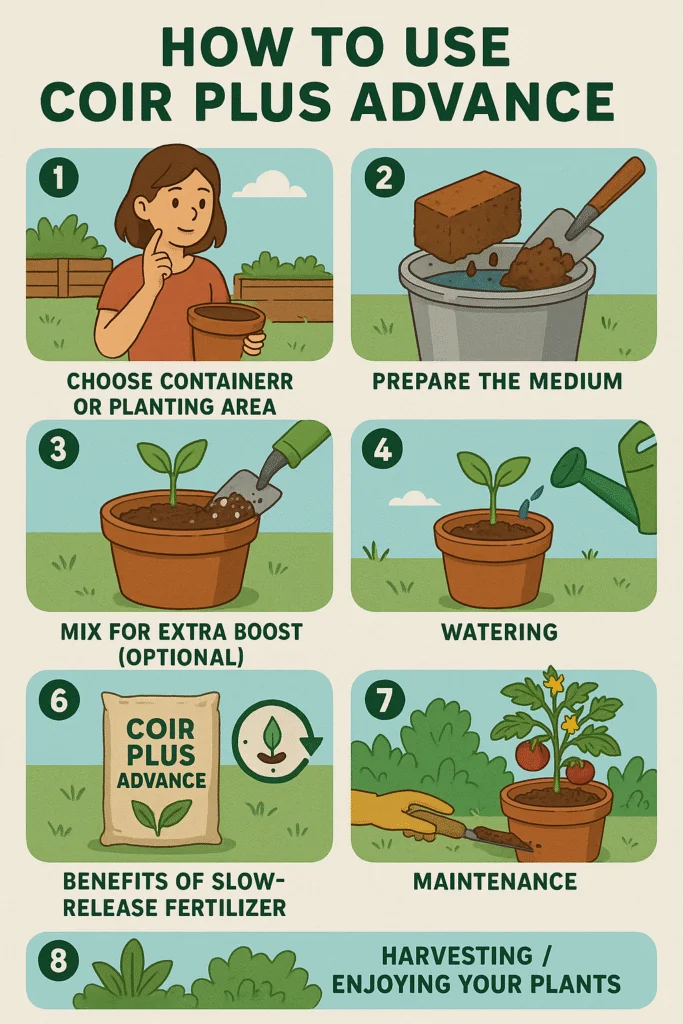
Step by Step Guide to Using Coir Plus Advance
- Choose Your Container or Planting AreaCoir Plus Advance works well in pots, raised beds, garden containers, or even large planting troughs. Ensure your containers have proper drainage to prevent waterlogging.
- Prepare the MediumIf using Coir Plus Advance in compressed blocks, soak the block in water according to package instructions until it expands. Fluff the coir to create a light, airy growing medium ready for planting.
- Mix for Extra Boost (Optional)
For highly nutrient demanding plants, you can mix Coir Plus Advance with additional compost or perlite to further enhance aeration and drainage. - PlantingPlant your seeds, seedlings, or transplants directly into the prepared Coir Plus Advance. The medium provides the right environment for roots to establish quickly.
- WateringWater lightly after planting to settle the medium around the roots. Coir Plus Advance retains water efficiently, so regular watering is easy. Avoid overwatering, as the medium already holds moisture well.
- Benefits of the Slow Release Fertilizer
The integrated slow release fertilizer is one of the standout features of Coir Plus Advance. It releases nutrients gradually, giving your plants a continuous feed for up to six months. This:
-Reduces the need for additional feeding
-Supports healthy growth throughout the season
-Encourages strong flowering, fruiting, and foliage development
-Ensures nutrient availability even if you occasionally forget to feed your plants - Maintenance
Monitor moisture levels and top up with water as needed. You may also add a thin layer of mulch on top to retain moisture and reduce evaporation. The slow release fertilizer ensures your plants remain nourished for months without additional effort - Harvesting / Enjoying Your Plants
For vegetables, herbs, or fruits, enjoy the produce over the growing season. For flowers and ornamentals, watch them flourish and bloom beautifully with minimal intervention.
Quick Coir Plus Advance Checklist
- Choose container or planting area with proper drainage
- Soak Coir Plus Advance block (if compressed) and fluff medium
- Mix with perlite or compost if desired
- Plant seeds, seedlings, or transplants
- Water lightly to settle medium
- Allow slow release fertilizer to feed plants for up to 6 months
- Monitor moisture regularly
- Top up water or mulch as needed
- Enjoy strong, healthy, and thriving plants
Why Coir Plus Advance with Slow Release Fertilizer Works So Well
Combining coir with slow release fertilizer creates an ideal growing environment. The coir retains water and supports root aeration, while the fertilizer continuously nourishes your plants. This synergy allows plants to grow steadily, produce vibrant foliage, flowers, or fruits, and reduces the gardener’s workload. With just one medium, you get sustainable, low maintenance, and nutrient rich growth for months, making Coir Plus Advance a smart choice for both beginners and experienced gardeners.
Disclaimer: This article is provided for general information only and does not constitute engineering, environmental, design, legal, or professional advice. Project-specific advice should always be obtained from suitably qualified professionals.
Starting your first garden can be exciting, but anyone new to gardening quickly discovers that weeds are one of the biggest challenges. They compete with your plants for water, nutrients, and sunlight, and can make even a small garden look untidy. That’s where coir mulch mats come in. These natural, eco-friendly mats are designed to suppress weeds, conserve moisture, and improve overall plant health all while being sustainable and easy to use.
What Are Coir Mulch Mats?
Coir mulch mats are made from coconut husk fibers that are pressed into durable mats. Unlike synthetic weed barriers, coir mats are completely biodegradable and safe for the environment. They work by forming a protective layer over the soil, which blocks sunlight from reaching weed seeds, preventing them from germinating. At the same time, the mats allow water, air, and nutrients to pass through to your plants’ roots.
Benefits of Using Coir Mulch Mats
- Natural Weed ControlBy blocking light, coir mulch mats drastically reduce the number of weeds that emerge in your garden. This means less time spent weeding and more time enjoying your plants.
- Moisture RetentionCoir fibers retain water efficiently, keeping soil moist for longer periods. This reduces the frequency of watering, particularly during dry spells, and helps young plants establish quickly.
- Soil Protection and HealthCoir mats help prevent soil erosion and compaction. They maintain a healthy environment for plant roots by improving aeration and allowing nutrients to circulate naturally.
- Eco-Friendly and BiodegradableUnlike plastic weed barriers, coir mats break down naturally over time, returning nutrients to the soil and leaving no harmful residues. This makes them ideal for environmentally conscious gardeners.
- Versatile for Any Garden
Coir mulch mats work in flower beds, vegetable patches, raised beds, and even container gardens. They are flexible and easy to cut to fit any shape or size of planting area.
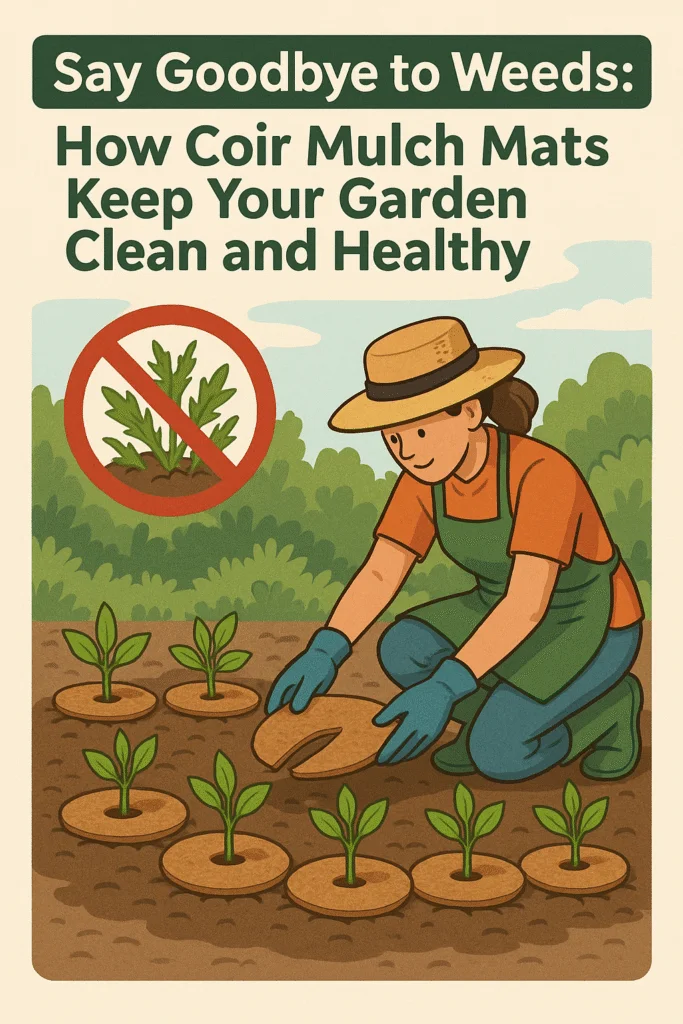
How to Use Coir Mulch Mats in Your Garden
- Prepare Your Garden BedClear the area of large weeds and debris. Loosen the soil lightly so that your plants can establish their roots easily.
- Lay the Coir Mulch MatPlace the mat over the soil, covering the entire planting area. Overlap edges slightly to prevent weeds from sneaking through.
- Secure the MatUse garden staples, pegs, or pins to keep the mat in place, particularly on slopes or uneven ground.
- Planting Through the MatCoir mats are easy to cut or puncture. Make small holes where you want to plant your seeds or seedlings. Plant as usual, ensuring roots are in contact with the soil beneath the mat.
- Water and MaintainWater thoroughly after planting. The coir mat will retain moisture and slowly decompose, enriching the soil as it breaks down.
Case Study: A First Time Gardener’s Experience
When Jane, a beginner gardener, started her first vegetable patch, she struggled with weeds overtaking her seedlings. After switching to coir mulch mats, she noticed a remarkable difference. Not only were her plants healthier, but the time she spent weeding dropped dramatically. Tomatoes, carrots, and herbs thrived under the protective layer of coir, and the soil remained moist even during hot summer days. Within months, the mats had begun to decompose naturally, leaving behind rich, fibrous matter that improved soil structure
Tips for Best Results
- Overlap mats at the edges to prevent weeds from sneaking in.
- Water the mat lightly after installation to help it settle and begin integrating with the soil.
- Combine coir mats with organic mulch for added moisture retention and soil enrichment.
- Replace mats every 1–2 seasons, depending on decomposition rate and plant growth.
Coir Mulch Mat Quick Checklist
- Clear garden bed of large weeds and debris
- Loosen soil lightly for better root growth
- Lay coir mulch mat over the soil, covering the entire area
- Overlap edges slightly to prevent weeds from sneaking through
- Secure mat with garden staples, pegs, or pins
- Cut small holes for seeds or seedlings and plant as usual
- Water thoroughly after planting
- Monitor soil moisture; water as needed
- Replace mats every 1–2 seasons as they decompose
- Optional: add extra mulch on top for extra moisture and protection
Disclaimer: This article is provided for general information only and does not constitute engineering, environmental, design, legal, or professional advice. Project-specific advice should always be obtained from suitably qualified professionals.
Starting seeds at home can feel intimidating for first time gardeners. Traditional methods often involve messy soil, precise watering, and a lot of trial and error. Coir discs offer a simple, clean, and eco-friendly solution that makes seed starting easy, even for beginners. Made from natural coconut husk fibers, coir discs provide a sustainable medium that retains moisture, supports strong root development, and eliminates the need for soil.
What Are Coir Discs?
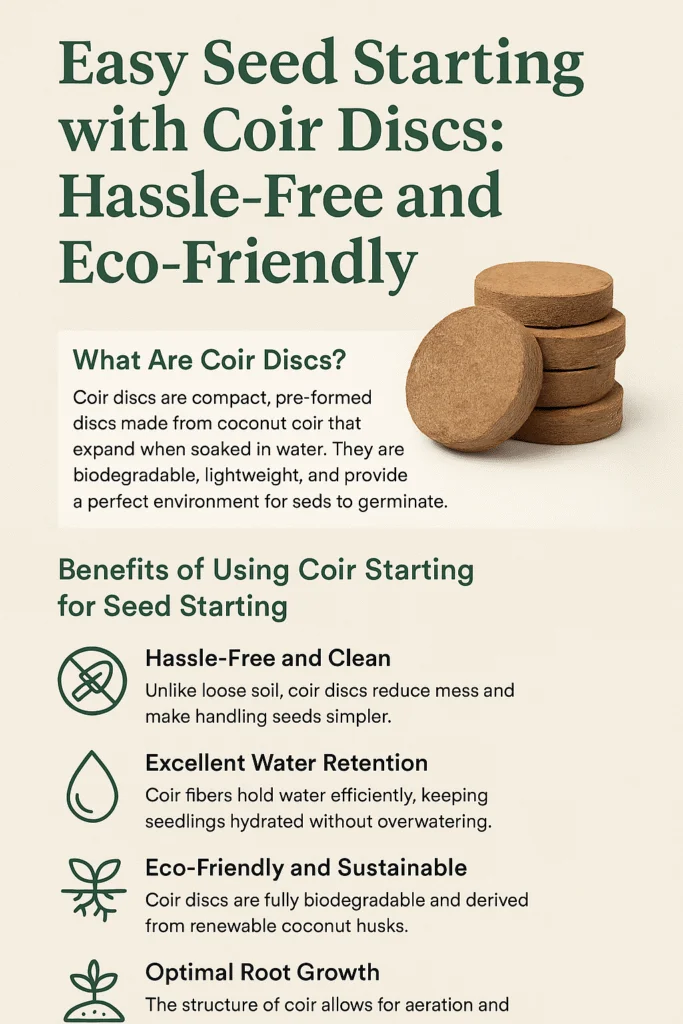
Coir discs are compact, pre formed discs made from coconut coir that expand when soaked in water. They are biodegradable, lightweight, and provide a perfect environment for seeds to germinate. Once soaked, each disc becomes a fluffy, nutrient rich mini planting bed that holds moisture evenly, ensuring young seedlings have everything they need to grow strong roots.
Lorem ipsum dolor sit a met, consectetur adipiscing elit. Ut elit tellus, luctus nec ullamcorper mattis, pulvinar dapibus leo.
Benefits of Using Coir Discs for Seed Starting
- Hassle Free and Clean
Unlike loose soil, coir discs reduce mess and make handling seeds simpler. There’s no need for trays of soil or frequent cleanups. - Excellent Water RetentionCoir fibers hold water efficiently, keeping seedlings hydrated without overwatering. This reduces the risk of seedlings drying out or suffering from root rot.
- Eco-Friendly and SustainableCoir discs are fully biodegradable and derived from renewable coconut husks, making them an environmentally conscious choice.
- Optimal Root GrowthThe structure of coir allows for aeration and prevents roots from becoming compacted. Seedlings establish faster and develop strong, healthy roots.
How to Get Started with Coir Discs
- Choose Your Seeds
Select seeds based on your garden plans. Common beginner friendly seeds include tomatoes, peppers, lettuce, radish, basil, and coriander. Each seed type has specific germination times, so check the packet instructions. - Prepare the Coir DiscPlace each dry coir disc into a tray or container. Add water slowly and watch as the disc expands into a soft, fluffy planting medium. Depending on the disc size, it may take a few minutes to fully expand. Fluff the coir lightly to ensure it’s evenly hydrated.
- Plant the SeedsCreate a small indentation in the center of the coir disc using your finger or a small tool. Place 1–2 seeds into the hole. Cover lightly with a thin layer of coir, as seeds need darkness to germinate.
- Provide Adequate WaterMist the discs gently or water from the bottom to avoid washing away seeds. Keep the coir consistently moist but not waterlogged.
- Ensure Proper Light and TemperaturePlace the tray in a warm, bright location. Seedlings need around 12–16 hours of light daily to grow strong. If natural sunlight is limited, a small grow light can be used.
- Monitor GrowthWithin days to weeks, depending on seed type, seedlings will begin to sprout. Keep an eye on moisture levels and watch for any signs of overwatering or mold.
- Transplanting
Once seedlings are strong enough and have developed a few true leaves, they can be transplanted directly into your garden, pots, or raised beds. Simply plant the entire coir disc with the seedling its biodegradable nature means it will naturally integrate into the soil, supporting the plant as it grows.
Case Study: A Beginner Gardener’s Experience
Emma, a first time gardener, wanted to grow herbs on her kitchen windowsill but was nervous about using soil and keeping seeds alive. She discovered coir discs and decided to give them a try. Emma placed a few coir discs in a small tray, added water, and watched them expand. She planted basil, coriander, and lettuce seeds.
Within a week, tiny green shoots appeared. Emma was amazed at how easy it was to maintain moisture and watch her seeds grow without messy soil. When the seedlings were ready for transplanting, she simply moved the entire discs into pots. Her herbs flourished, and the coir discs decomposed naturally, enriching the soil. The process was clean, simple, and gave her confidence to try growing more varieties in the future.
Tips for Best Results
- Use fresh seeds for better germination rates.
- Keep coir discs moist but avoid overwatering.
- Rotate trays for even light exposure.
- Label your seeds to keep track of different varieties.
- Once seedlings are transplanted, water carefully to help them acclimate to their new environment.
Disclaimer: This article is provided for general information only and does not constitute engineering, environmental, design, legal, or professional advice. Project-specific advice should always be obtained from suitably qualified professionals.
Gardening is an art as much as it is a science, and using natural, sustainable materials can make your garden both beautiful and eco-friendly. Coir yarn, made from the fibers of coconut husks, is one of the most versatile and environmentally friendly tools for gardeners. Lightweight, biodegradable, and strong, coir yarn can be used to tie plants, create trellises, and provide support without harming your garden or the planet. This guide will walk beginners through the creative ways to use coir yarn in their gardening projects.
Why Choose Coir Yarn?
Coir yarn is naturally resistant to rot, UV rays, and moisture, making it ideal for outdoor use. Unlike synthetic twines, it breaks down over time, returning organic matter to the soil. For beginners, this means you can experiment freely without worrying about harming your plants or leaving plastic waste behind.
Some benefits include:
- Eco-friendly: Fully biodegradable and sustainable.
- Strong and durable: Supports even heavier plants like tomatoes or beans.
- Gentle on plants: Soft fibers reduce the risk of cutting stems or branches.
- Versatile: Perfect for tying, trellising, or crafting plant supports.
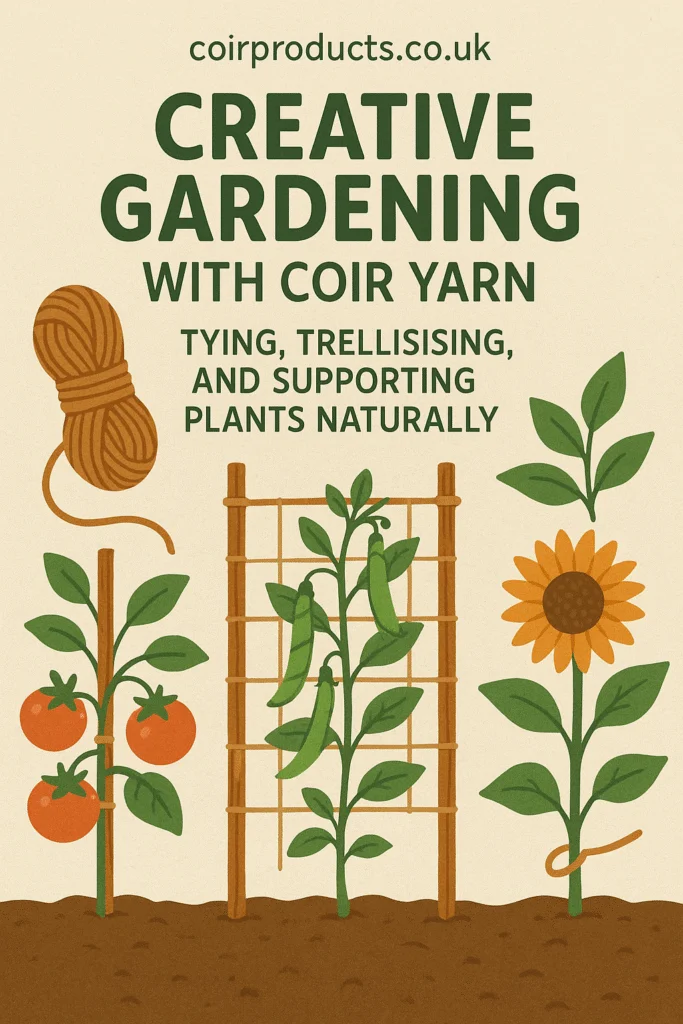
Creative Ways to Use Coir Yarn
1. Tying Plants
Tying plants is essential for guiding growth, preventing damage, and maintaining neat garden beds. Use coir yarn to secure plants to stakes, supports, or trellises.
How to tie plants with coir yarn:
- Cut a length of coir yarn, roughly 30–50 cm depending on the plant size.
- Form a loose loop around the plant stem and stake. Avoid pulling too tight; plants need room to grow.
- Twist the ends of the yarn together to secure it.
Tip: For delicate plants, double the yarn or use a figure-eight knot to reduce friction.
2. Trellising Climbing Plants
Climbing plants like peas, beans, and cucumbers need vertical support. Coir yarn can be used to create simple trellis systems.
DIY coir trellis steps:
- Place two stakes into the ground about 1–2 meters apart.
- Stretch coir yarn horizontally between the stakes, spacing rows 15–20 cm apart.
- For extra stability, weave vertical yarn strands between horizontal rows, creating a grid for plants to climb.
3. Supporting Branches and Heavy Fruits
Fruit-bearing plants or tall flowers may require extra support to prevent breakage. Coir yarn is perfect for creating gentle slings or hammocks to cradle heavy branches.
Example: Tie a loop of coir yarn under a tomato cluster and secure it to a stake. This distributes the weight evenly, preventing stems from snapping.
Case Study: Beginner Garden Success
Sarah, a novice gardener, transformed her small balcony garden using coir yarn. By tying her climbing beans to a lightweight trellis, she increased her yield while keeping plants healthy. Using coir yarn instead of plastic ties made her garden visually appealing and completely sustainable. Within one season, her beans grew stronger, and she noticed reduced plant stress compared to her previous use of nylon twine.
Quick Checklist for Gardening with Coir Yarn
- Select biodegradable coir yarn suitable for plant support.
- Gather stakes, scissors, and clips if needed.
- Plan trellis or support structures before planting.
- Tie plants loosely; allow room for growth.
- Check yarn periodically; replace if it has broken down.
- Experiment with creative patterns, knots, and supports
Disclaimer: This article is provided for general information only and does not constitute engineering, environmental, design, legal, or professional advice. Project-specific advice should always be obtained from suitably qualified professionals.
Healthy soil is the foundation of a thriving garden. Whether you are growing vegetables, flowers, or houseplants, the quality of your soil directly affects plant growth, yield, and resilience. Coir Ditioner, a natural soil enhancer made from coconut coir fibers, is an eco-friendly solution for revitalizing tired or depleted soil. Lightweight, sustainable, and easy to use, it improves soil structure, water retention, and nutrient availability, giving your plants the perfect environment to flourish.
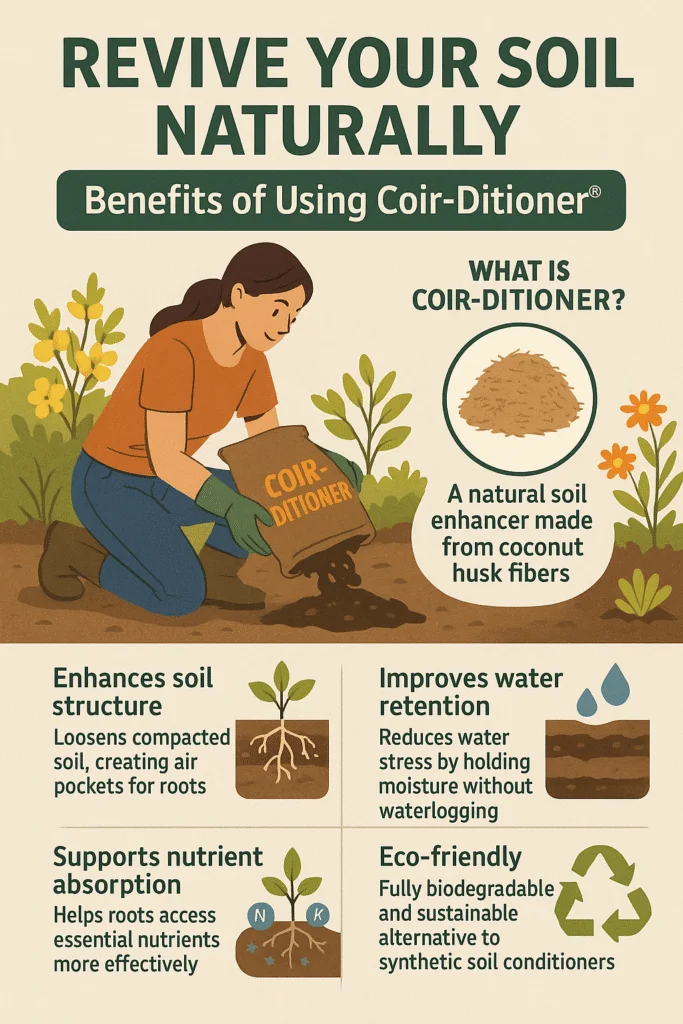
What is Coir Ditioner®?
Coir Ditioner® is derived from coconut husk fibers that are processed into a fine, fibrous medium. Unlike traditional chemical conditioners, it is fully biodegradable and safe for both indoor and outdoor gardening. By improving soil aeration and moisture retention, Coir Ditioner helps plants establish strong root systems and reduces the need for frequent watering.
Key benefits of Coir Ditioner®:
- Enhances soil structure: Loosens compacted soil, creating air pockets for roots.
- Improves water retention: Reduces water stress by holding moisture without waterlogging.
- Supports nutrient absorption: Helps roots access essential nutrients more effectively.
- Eco-friendly: Fully biodegradable and sustainable alternative to synthetic soil conditioners.
- Versatile: Suitable for garden beds, potted plants, seed starting, and compost mixing.
How Coir Ditioner® Revives Your Soil
1. Improving Soil Texture
Many gardeners struggle with clay heavy or compacted soil. Coir Ditioner® loosens dense soil while maintaining its ability to hold water. For sandy soils, it improves water retention and prevents nutrients from washing away.
Application: Mix Coir Ditioner into the top 10–15 cm of soil before planting. For container gardening, blend it with potting soil at a 1:3 ratio (Coir Ditioner®:potting mix).
2. Encouraging Healthy Root Growth
A well aerated soil allows roots to penetrate deeply, anchoring plants and enhancing nutrient uptake. Coir Ditioner’s fibrous structure creates natural air pockets, reducing root stress and promoting faster, stronger growth.
3. Boosting Moisture Retention Naturally
Plants struggle in soils that dry out quickly. Coir Ditioner® acts like a sponge, holding water near roots while preventing waterlogging. This is especially useful for young seedlings, container plants, and drought prone gardens.
4. Supporting Microbial Life
Healthy soil is alive with microorganisms that decompose organic matter and convert nutrients into forms plants can absorb. Coir Ditioner® encourages beneficial microbes by providing aeration and a stable, natural environment, enhancing overall soil fertility.
Case Study: Bringing Life Back to a Vegetable Garden
Tom, a beginner gardener, faced poor harvests due to compacted clay soil. After adding Coir Ditioner® to his garden beds, he noticed immediate improvements. Soil became lighter, retained water evenly, and young seedlings grew faster. By the end of the season, tomatoes, peppers, and carrots were healthier, more abundant, and less prone to disease. Tom continues to use Coir Ditioner® annually as part of his soil care routine, achieving sustainable and consistent results.
Quick Checklist for Using Coir Ditioner
- Choose the right quantity for your garden size (usually 2–5 kg per square meter).
- Mix thoroughly into existing soil before planting.
- For potted plants, combine 1 part Coir Ditioner® to 3 parts soil.
- Water after application to help fibers integrate into the soil.
- Monitor plant growth and add more Coir Ditioner® annually if needed.
- Store unused Coir Ditioner® in a dry place to prevent mold growth.
Disclaimer: This article is provided for general information only and does not constitute engineering, environmental, design, legal, or professional advice. Project-specific advice should always be obtained from suitably qualified professionals.