
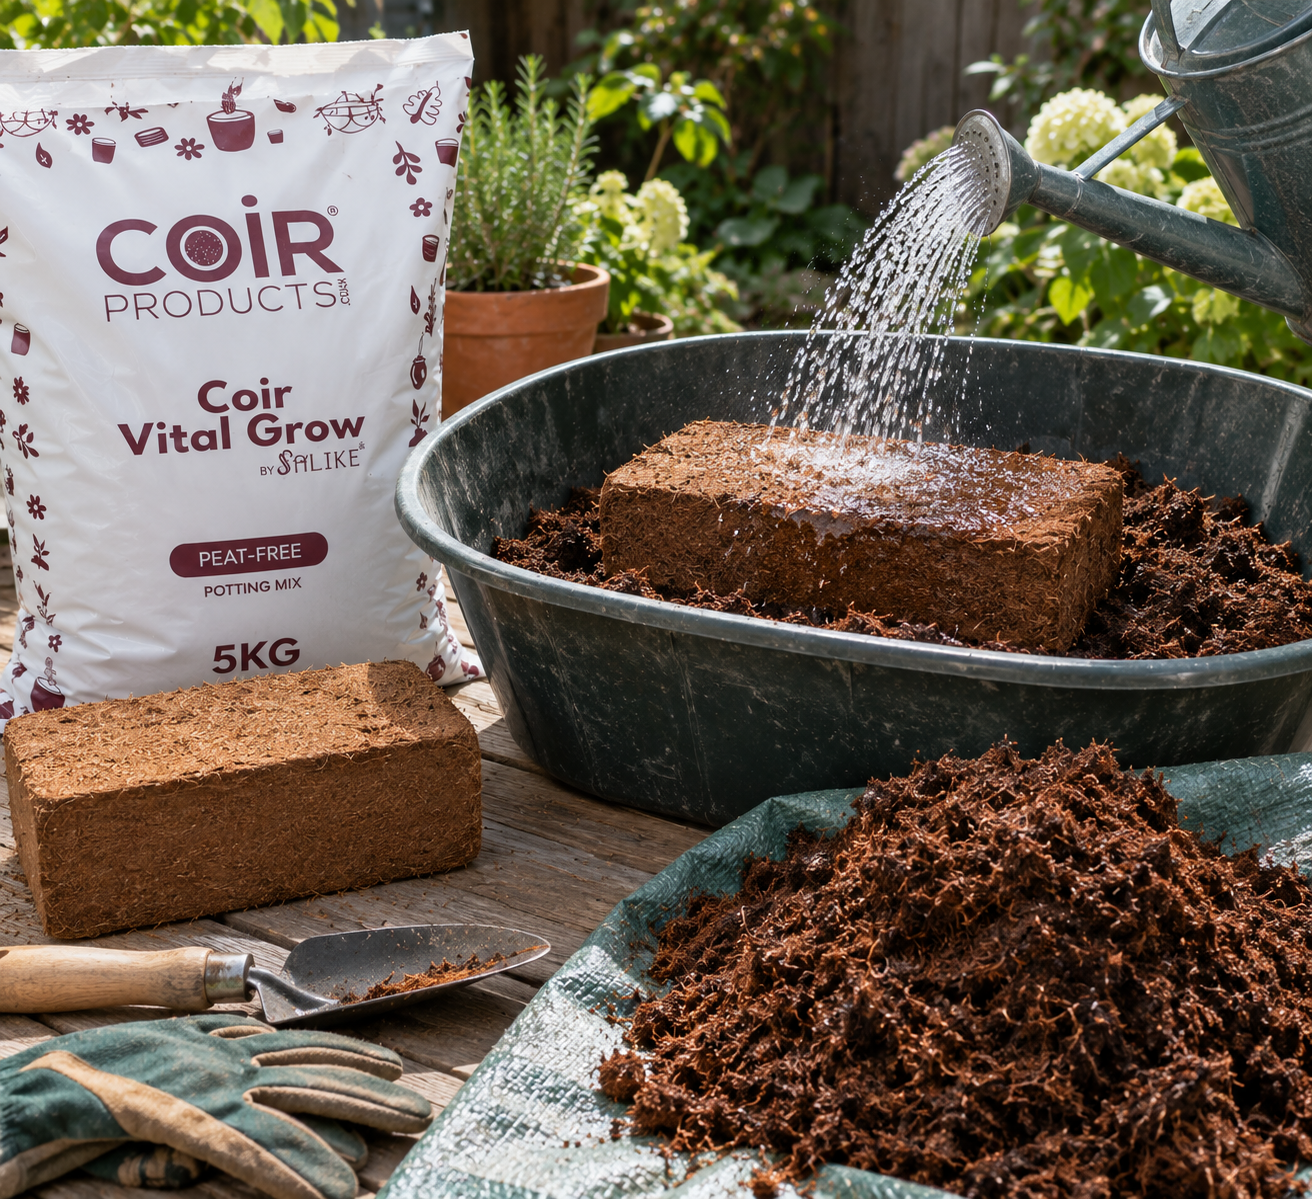
There is something rather satisfying about preparing a coir brick.
What begins as a compact, remarkably solid block can, with little more than water and a few minutes of attention, become a generous quantity of loose growing medium ready for pots, containers, seedlings and general gardening.
If you have never used compressed coir before, however, that first brick can raise a few questions. How much water should you add? How long should you leave it? And how do you know when it is ready?
Fortunately, there is very little complication involved.
What Is a Coir Brick?
A coir brick is coir fibre that has been processed, dried and compressed into a convenient block.
Compression makes an enormous difference to storage and handling. Instead of keeping a large volume of loose growing medium in the shed or greenhouse, you can store a relatively small brick and expand it when you actually need it.
Our CoirProducts® Coir Vital Grow® 5kg Coir Potting Mix, for example, expands to approximately 80 litres when fully hydrated and prepared.
So, how do you get from brick to growing?
Step 1: Choose a large enough container
Before adding any water, give the coir somewhere to expand.
A large garden trug, wheelbarrow or suitably sized container works perfectly well. For larger bricks, make sure there is considerably more room than the dry brick appears to need.
This is one of those occasions when an oversized container is rather preferable to discovering halfway through that your coir has outgrown the bucket.
Step 2: Add luke-warm water gradually
Begin adding clean water across the surface of the brick.
There is no need to drown it immediately. Adding luke-warm water gradually allows you to judge how the brick is responding and makes it easier to achieve an evenly hydrated growing medium without ending up with an unnecessarily saturated mixture.
You will soon see the outer layers beginning to swell and soften.
Step 3: Give it time to expand
This is the part that requires a little patience.
Allow the water to work its way into the compressed material. As it does, the brick will begin opening naturally and increasing considerably in volume.
Resist the temptation to attack the still-dry centre immediately with a garden tool.
Give the water a chance to do the work first.
Step 4: Gently loosen the coir
Once the outer material has softened, begin gently breaking it apart by hand or with a suitable garden tool.
Work from the hydrated sections towards any remaining compressed areas.
If you discover a dry section in the centre, simply add a little more water and allow it to absorb before continuing.
The aim is a light, evenly loosened growing medium, rather than large pieces of partially expanded brick.
Step 5: Check the moisture
When properly prepared, the coir should feel pleasantly moist and workable.
It should not need to be dripping wet.
Take a handful and feel the texture. If substantial dry pieces remain, add a little more water. If the material is already thoroughly wet, there is little benefit in continuing to add more.
Gardening rarely rewards the assumption that more water must automatically be better.
Step 6: Fluff and mix
Once the brick is completely hydrated, give the expanded coir a final loosening.
This helps restore its naturally open structure and distributes moisture more evenly throughout the material.
You should now have something that bears remarkably little resemblance to the dense brick with which you started.
Step 7: Prepare it for what you are growing
This final step is important because not every coir product is formulated in precisely the same way.
Plain coir provides an excellent physical growing environment, but it should not automatically be assumed to contain all the nutrition a plant will require.
Depending upon the product and what you intend to grow, appropriate plant nutrition may need to be incorporated or provided as the plants develop.
Alternatively, you can choose a coir growing medium that has already been formulated with nutrition for a particular purpose.
At CoirProducts®, our range includes different coir growing media for precisely this reason. What suits seed starting is not necessarily identical to what a hungry vegetable crop or established houseplant requires.
What can you use expanded coir for?
Once prepared, coir is remarkably versatile.
It can be used for pots and containers, seed sowing, propagation, raised growing areas, GrowBags and a wide variety of indoor and outdoor plants, depending upon the particular coir formulation being used.
Its ability to retain useful moisture whilst maintaining an open structure around the roots is one of the principal reasons growers value it.
And because it begins in compressed form, you can prepare what you need rather than finding somewhere to accommodate several cumbersome bags of loose growing medium.
How much does a 5kg coir brick make?
This is one of the questions we’re asked most frequently.
Our 5kg Coir Vital Grow® Coir Potting Mix produces approximately 80 litres when fully expanded and prepared.
The exact volume you see can vary somewhat according to hydration, how thoroughly the material has been loosened and the method used to measure the finished volume.
We’ve explained this in greater detail in our guide, “How Much Does a 5kg Coir Brick Make? Understanding Expansion, Litres & Hydration”.
More than 11 years working with coir
At CoirProducts®, we’ve been supplying coir growing products in the UK for more than 11 years.
In that time, we’ve seen many gardeners encounter compressed coir for the first time. The questions are often remarkably similar: How much water? How large will it become? Is it ready yet? What can I grow in it?
And that is precisely why we believe good products should be accompanied by good information.
Coir doesn’t need to be complicated. Once you’ve hydrated your first brick, the process becomes wonderfully straightforward.
Give it room. Add water gradually. Allow it to expand. Loosen it thoroughly. Then get growing.
Sometimes the simplest gardening jobs are among the most satisfying.
 Share:

Leave a Reply