
By November, most of the garden has slowed down. The days are shorter, the greenhouse is quieter, and there isn’t quite as much to do outside.
But if you miss having something growing, you don’t have to wait until spring.
Microgreens are a lovely little winter project. They take up very little room, grow relatively quickly and bring fresh flavours into the kitchen when there’s not much happening in the garden.
A tray of radish, mustard or pea shoots on a bright windowsill can be surprisingly satisfying. And you don’t need a greenhouse or a collection of gardening tools to get started.
Here’s how to grow microgreens indoors during the colder months, what to watch out for, and how coir microgreen sheets can make the process a little tidier.
Microgreens are young edible seedlings, usually harvested once their first true leaves begin to appear. They’re grown for their tender shoots and leaves, which can be added to salads, sandwiches, soups and plenty of other everyday meals.
Despite their small size, different varieties have quite distinctive flavours.
Radish microgreens have a pleasant peppery kick, while pea shoots are mild, sweet and particularly good in salads or stir-fries. Mustard brings a little heat, and broccoli microgreens have a gentler flavour.
If you’re trying them for the first time, radish or pea shoots are good varieties to consider. Choose seeds sold as suitable for edible microgreen production, and follow the supplier’s instructions.
One of the pleasures of growing microgreens is watching how quickly things change. What begins as a tray of seeds can become a little patch of green shoots in a relatively short time.
You don’t need a dedicated growing room. A bright windowsill, a shelf with a suitable grow light or a small space in the kitchen can work well.
The main thing to remember during winter is that daylight is limited.
A south-facing window may provide enough light for some crops, but a gloomy windowsill won’t necessarily give young seedlings what they need. If the shoots become unusually long, thin or pale, they may be struggling for light.
A small LED grow light can be useful, particularly through December and January when the days are at their shortest.
Temperature matters too. Most commonly grown microgreens prefer reasonably mild indoor conditions, although the ideal temperature varies by variety. Keep trays away from cold draughts and direct heat from radiators, both of which can make moisture management more difficult.
And don’t forget ventilation. A little airflow helps prevent the damp, stagnant conditions that can encourage mould.
There are several ways to grow microgreens, including using loose growing media or specially prepared growing mats.
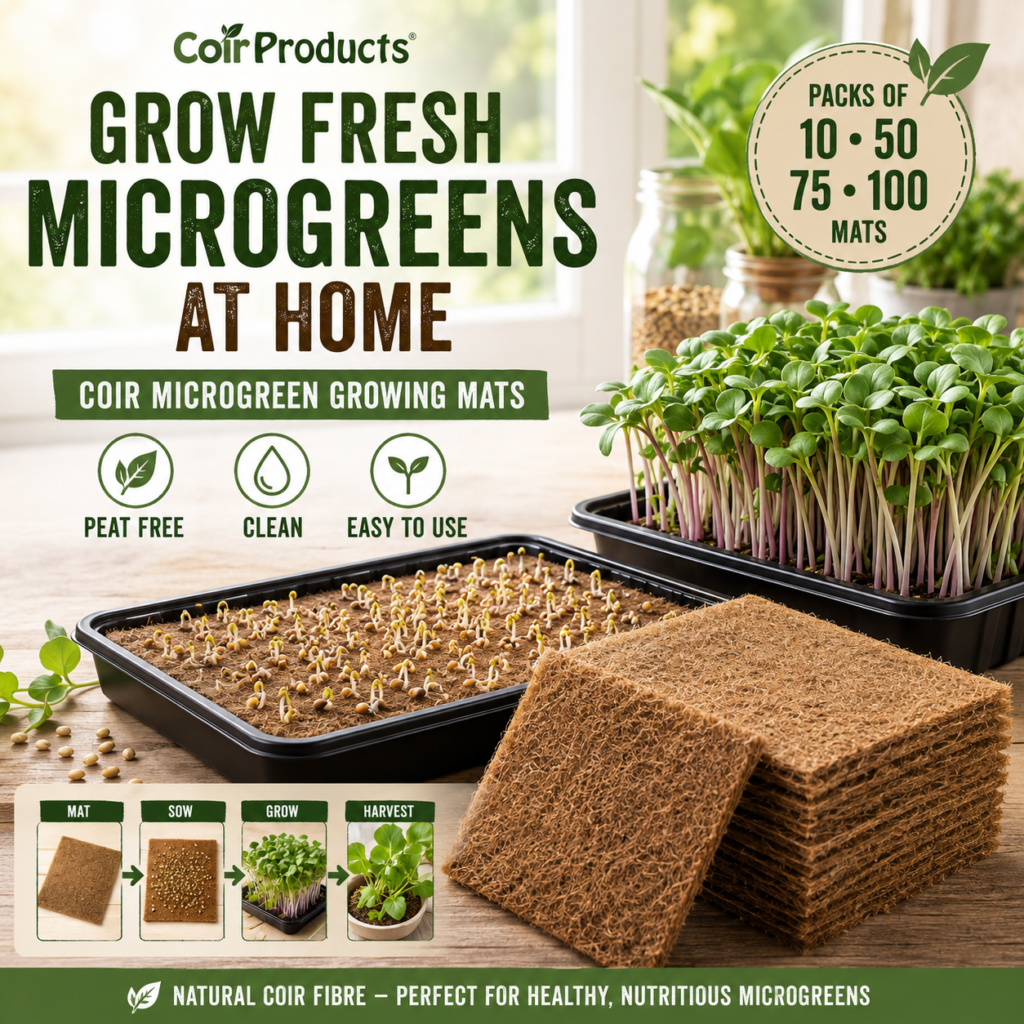
At CoirProducts®, we particularly like the simplicity of coir sheets for smaller indoor growing projects.
Coir comes from the fibrous outer husk of coconuts. Its natural structure allows it to absorb and retain moisture, which makes it useful as a growing surface for young seedlings.
Rather than filling a tray with loose compost, you can place a prepared coir sheet inside and sow directly onto the surface, following the instructions for your chosen seeds.
It’s a convenient option if you’re growing on a kitchen worktop or somewhere you’d rather not have loose growing medium scattered about.
Our Coir Microgreen Sheets are designed for this type of growing, providing a dedicated coir surface for sowing and raising young microgreens.
The important thing is to keep the sheet evenly moist without leaving it sitting in excess water. Coir holds moisture well, but that doesn’t mean the tray should be constantly soaked.
If you’ve never grown microgreens before, start with one variety. It’s easier to see how the seedlings develop and get a feel for their watering needs.
Prepare your tray
Choose a clean, shallow growing tray and place your coir microgreen sheet inside. Prepare and moisten the sheet according to its instructions, making sure it sits evenly in the tray.
A tray that allows you to manage drainage is particularly useful, as you don’t want water collecting around the roots.
Sow the seeds
Scatter your seeds evenly over the prepared surface, following the recommended sowing density for that variety.
Microgreens are generally grown more closely together than ordinary seedlings, but there’s still a balance to strike. Too many seeds crowded into one area can make watering and airflow more difficult.
Some varieties benefit from a short covered germination period, while others have different requirements. Always check the seed supplier’s guidance rather than treating every variety in exactly the same way.
Keep an eye on moisture
This is probably the part that takes the most getting used to.
Check the growing surface regularly and add water when needed. You want the seeds and developing roots to have access to moisture, without leaving the tray waterlogged.
In a warm kitchen, a tray may dry out more quickly than expected. Somewhere cooler, it might stay damp for longer.
There isn’t a single watering schedule that works for every home, so it’s worth checking the sheet rather than watering automatically.
Give the seedlings enough light
Once your seeds have germinated and the shoots are developing, make sure they receive suitable light.
During the darker winter months, a grow light can help if natural daylight is insufficient. Follow the light manufacturer’s guidance for positioning and duration.
You’ll soon begin to recognise how healthy seedlings should look for the variety you’re growing.
Microgreens are relatively straightforward to grow, but a few small mistakes can spoil a tray.
Overwatering is a common one. Constantly saturated growing media, especially in a warm room with little airflow, can encourage unwanted mould.
Cleanliness matters too. Wash your trays thoroughly between crops, use clean water and avoid handling the seedlings unnecessarily.
It’s also important to use seeds intended for edible growing. Not every packet of garden seeds is suitable for microgreen production, particularly if the seeds have been treated or the plant itself isn’t appropriate for eating at the seedling stage.
If a crop develops visible mould, an unpleasant smell or signs of spoilage, discard it rather than trying to rescue it for eating.
Starting with a single tray makes it much easier to spot problems and adjust your approach before growing more.
One of the nicest things about microgreens is that you don’t have to wait months to enjoy what you’ve grown.
Many varieties can be ready within a couple of weeks, although the timing depends on the seeds, temperature and light conditions.
Harvest them at the stage recommended for your chosen variety, usually when the young shoots have developed their first true leaves or are approaching that point.
Use clean scissors to cut the shoots above the growing surface, taking care not to include the roots or coir fibres.
Handle the harvested greens hygienically, wash them as appropriate and follow suitable food-storage guidance. Freshly harvested microgreens are lovely in sandwiches, salads or sprinkled over a meal just before serving.
And once you’ve finished one tray, you can clean your equipment and start another.
There’s something rather satisfying about having a small tray of greenery growing indoors when the garden outside is cold and quiet.
You might begin with radish, try pea shoots next time, and eventually find yourself experimenting with different varieties and flavours.
It’s also a lovely way to introduce children to growing. They can watch the seeds germinate, help check the moisture and see the results of looking after something day by day.
You don’t need much room, and you certainly don’t need to be an experienced gardener.
Sometimes a little growing project on the windowsill is all it takes to keep that gardening enthusiasm going through winter.
At CoirProducts®, we’ve been helping British growers make the most of coir since 2015. Whether you’re tending a greenhouse, growing vegetables outdoors or trying your first tray of microgreens in the kitchen, we believe good growing starts with understanding the materials you use.
If you’re planning to give indoor growing a try this winter, explore our Coir Microgreen Sheets and see where a few seeds might take you.
CoirProducts® – A Grower’s Choice.
Added to cart
Check out our shop to see what's available